When it comes to soundproofing a car, no brand can beat Dynamat as I have proved in my various comparisons. There are a few areas where other products outperform it. It is expensive when compared to the competitors and can be a little hard to install, especially for someone with no prior experience. While I can’t do anything to bring the costs of the product down, I can definitely help you with the installation process. In this guide, I will walk you through the method of fitting Dynamat on the floor. There will be some installation tips included to make the process easier. Applying Dynamat to the door is similar, and Dynamat Door Kit makes the whole thing a walk in the park.
Table of Contents
Why Install Dynamat On Floor?
The noise can travel best through the metal surfaces, and that’s the one thing all cars have in common. And the car floor is also part of this. Due to its proximity to the road, the noise can enter the vehicle.
Soundproofing this part contributes significantly to the whole process. Furthermore, this part needs the most preparation for the installation.
What Would We achieve?
After placing the Dynamat on the floor, we would be able to feel a major decrease in the engine noise, road noise, and reduce echoes, which will improve the car audio experience. Since we are talking about improved music experience, give a try to Amazon Music, it’s a one-month free trial. Now back on the main topic, with the help of this guide, you won’t need a professional for this task, bringing down the overall costs.
Required Tools
We will be using some standard tools for this procedure and Dynamat Xtreme. Make sure you have all the accessories if you lack access to any of the following tool, click on the item to buy it from Amazon.
- Trim removal kit
- Razor knife/Scissors
- Dynamat Xtreme
- Socket set with extension
- Screwdriver set
- A cloth and rubbing alcohol
- A pair of gloves
- Roller usually comes free with the Dynamat Xtreme.
Preparation
Before you begin the process, this action is required. This step is straightforward as you are going to install the material on the floor, and you can’t fit it without removing the seats, and don’t forget to remove the floor carpet from the car. This process differs from car to car, so I can’t help you with this. You can check the manual or a YouTube video for the removal process. Once you have done it, we can move on with the installation of the Dynamat. Make sure you have measured the area of your car and have bought enough material to cover the intended space.
Removing The Seats
There will be a slight difference depending on the cars. All the vehicles have their seats held by bolts. Use the wrench to remove the front and back seats. Even though not necessary, you can remove the seat belts too. This article is also helpful in removing the car seats, though it is for replacing the carpet. Just follow the article to the point where they remove the seats.
Removing the flooring carpet
Next, move on to the carpet. Begin from the trickiest area first, i.e., underneath the paddle, and from there, roll it along the way. Repeat the same process for the passenger side and then for the gear. Then move onto the seating area and continue towards the back of the car. Finally, remove it from the back door. This gives you an excellent opportunity to Vaccum the carpet while you are at it.
Preparing the floor surface
Use the Vaccum to get rid of any dirt on the floor and use a cloth with alcohol rubbing to remove any oil and grease. We don’t want any problem created due to any dust. It can alter the effectiveness of the material.
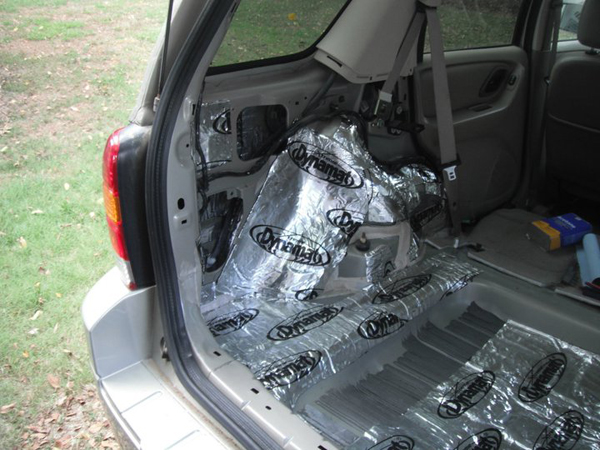
Installing Dynamat
If you have already measured and area, then well and good. Otherwise, the floor carpet will help you with that. Cut the Dynamat Xtreme accordingly with the help of a sharp knife, a scissor can also be used, but due to the thickness, the former is more preferable. It’s a peel and stick material. For better results, let the Dynamat bask in the sunlight for an hour, so the glue becomes adhesive.
Now place the sound dampening material where you want to apply it. Once satisfied, peel the adhesive layer from the top half and stick it to the area and roll it till it holds. Then remove the bottom part of the layer and apply it the same way. The whole process applies to the other parts like trunk and doors, as well. Use the knife to cut the sound deadening material from the area where it won’t be sticking.
After this place, the floor mats over the soundproofing material. And finally, screw the seats back in place.
Summary
The process of installing Dynamat itself isn’t difficult but the steps for preparing the car are rather time-consuming and can be tricky if you are doing it for the first time. For installing the Dynamat on the floor, remember to follow the half peel half stick approach. This makes the whole process more accurate and easier to manage. Once the sound deadening material is applied you will notice a significant decrease in the noise and the audio experience will be enhanced.
If you are interested in soundproofing your room, then you will like our guide on it.